
Sunday, June 9, 2013
Emergency Garage Shelves!
My garage was starting to look like a scene from Hoarders. I had some free time on Saturday morning so I headed down to Home Depot for 2 X 4s, and thin MDF sheets for shelving. I didn't need anything fancy. I just needed to build something that would keep my junk off the garage floor and make items easy to find. I built two 8 foot long shelf units with 2 shelves on one unit and three shelves on the other. The best part of this project was that since I wasn't doing anything fancy (just cutting and putting 2 X 4s together), the cost was only $88!


Thursday, May 16, 2013
From Barely Used Closet to Much Needed Home Office
If you've been reading my blog, you know that I have an awesome office closet. Well, my husband doesn't. When he works from home, he schleps his files with him and camps out in the kitchen or the living room. He really wanted his own office space. So the best solution would be to convert a guest room into an office, right? Not in our case as our guest rooms are in high demand by relatives and out of town visitors. Next solution would be a combo guest room and office, right? Nope. I hate those! While they work for some households and Pinterest has some awesome posts of guest room-office combos, they wouldn't work for us. First of all, our guests always come in pairs or more and neither of our spare guest rooms are large enough to accommodate a full or queen size bed plus a desk and other office necessities. So, what to do?
I decided to get a little creative. I knew that I wouldn't find the space in either guest room so I walked around the house to determine where I could find the space. I found the solution in a barely used guest room walk in closet and the linen hallway closet built next to it.
Project logistics: This project took around two weeks to complete (this included two full weekends of work and around 2 hours every day after work). I did the demo, sealed the old closet door to the guest room, painted and installed the laminate flooring, base boards, trim, desk and shelving unit. However, because there was electrical running through the partition wall, I did have to hire an (awesome!) electrician who moved the wiring, added two electrical outlets to the office and installed the track lighting.
I decided to get a little creative. I knew that I wouldn't find the space in either guest room so I walked around the house to determine where I could find the space. I found the solution in a barely used guest room walk in closet and the linen hallway closet built next to it.
 |
Top row (from left to right) : 1) Before of the original (and very stinky) linen closet 2) The linen closet gutted to the studs now exposing the drywall of the guest room walk in closet behind it 3) The drywall of the partition wall between linen and guest room closets now removed.
Middle row (from left to right): 1) Studs of the partition wall and remaining drywall removed 2) Room freshly drywalled and painted with Pergo laminate flooring installed 3) Office desk built and base boards installed
Bottom row: Office unit now complete with shelving unit and track lighting installed
|
 |
| After: My husband's new home office. No more paperwork schlepping or having to do his work on the kitchen island! I hope he gets a lot of use out of it |
 |
| Big thank you to my personal assistant on this project, my patient english bulldog, Mac. |
Monday, April 15, 2013
Chair makeover
I had a red chair from my old home and a silver and gray room in my new home. I loved the chair but hated the fabric and decided it was time for a quick makeover. This project took me around 2 hours to complete.
 |
| Before |
 |
| After: I removed the seating cushion and spray painted the frame with a a quick coat of primary followed by two coats of metallic silver paint. I had leftover blue and white fabric from a prior project and covered the fabric portion of the chair with a staple gun. I used silver cording from Joanne Fabrics to hide the staples. |
Thursday, March 7, 2013
Amazing Moroccan Lantern Wall
Greetings from San Diego! I'm taking a breather from my own household projects and decided to showcase someone else's awesome DIY for once.
Big thank you to my brooha, Lora, for letting me crash at her house, eat her food and take pictures of her gorgeous backyard. :-)
 |
| This gorgeous set up was created by my cousin, Lora. She wanted to dress up her detached garage wall and used a variety of decorative lanterns and spare curtain rod holders and plant hooks to hang them. |
 |
| I think what makes this wall so eye catching is that the lanterns are of similar design but no two are exactly the same. Lora decided to hang the lanterns at different heights, which makes the display more interesting to look at. |
 |
| This design would also look great on a fence panel in your yard or an a blank wall inside your home. If you are feeling inspired, World Market and Pier1 Imports have a great selection of exotic lanterns at affordable prices. |
Big thank you to my brooha, Lora, for letting me crash at her house, eat her food and take pictures of her gorgeous backyard. :-)
Saturday, February 9, 2013
Super Bowl Party!
I am not a big football fan but my husband loves the sport and treats Super Bowl like it's the sequel to Christmas. I'm always up for a good party so this year, we decided to do a baked potato bar and a nachos bar. We have a huge kitchen island so I decided to have some fun and create the "Nachos vs. Baked Potato Bowl 2013". Can't wait for the 2014 Super Bowl!  |
| We decided to create a football field on our island. Every football field needs goal posts. I created these using precut 12 inch PVC pipes from Home Depot. They were $1.29 each. To ground them, I stuck them in a small clay pot filled with gravel and painted it all yellow. |
 |
| We had around 12 toppings for the nachos and baked potatoes. I created two "bleachers" using 6 inch pine boards that I spray painted metallic silver. One bleacher stood 6 inches in height and the other one stood 3 inches in height. |
 |
| Isn't my husband talented? To stick with our Nachos vs. Baked Potato theme, he created little 49ers using craft store paint and red potatoes (leftover from Christmas, haha). |
 |
| We bought a green tablecloth with a grass pattern from Party City. My husband created the field lines and team names using medical tape. He's the true Pinterest junkie in this relationship :-) |
 |
| Formation time: Going with the purple color scheme for Baltimore, he created the opposing team out of purple corn chips and arranged them to look like Ravens. |
 |
| Touchdown! |
Tuesday, January 22, 2013
One Hour Makeover: Kitchen Coffee Station
I had a wall cabinet with a wine rack in my kitchen that I wasn't using. Rather than let the cabinet collect dust and take up space, I brainstormed over what to do with the cabinet. I didn't need to hold wine since I built a bar in the living room. I had a pantry for canned goods. Hmm...
I decided to make over the cabinet as a dedicated coffee station. I have a Keurig (once you go Keurig, you never go back) and tons of K-cups floating around my kitchen. Also, my coffee mugs were stored in three separate areas (very annoying when putting dishes away and more annoying when you are dying for a cup of coffee and can't find a cup in the morning).
Step 1) I removed the wine rack that was installed in the cabinet
Step 2) I added two shelves to the interior. To make the project simple, I purchased two laminate shelves that were a similar color to my cabinet from The Container Store for $8 each and trimmed them down to size. Hey, it's a one hour makeover.
Step 3) I filled candy jars and a Keurig storage case on the bottom shelf. On the second shelf, I displayed white cappuccino cups and matching saucers. On the top shelf, I displayed white decorative teapots. I had two storage spaces on the right hand side of the cabinet. I used these spaces to store mugs that I use the most.
Step 4) I placed my Keurig underneath the cabinet and plugged it in. I found some really cool jumbo sized mason jars from Target that I filled with all of my coffee essentials (such as Splenda, sugar and cookies)
Step 5) In the bottom cabinet, I stored ALL of my mugs that were in various places around the kitchen.
I decided to make over the cabinet as a dedicated coffee station. I have a Keurig (once you go Keurig, you never go back) and tons of K-cups floating around my kitchen. Also, my coffee mugs were stored in three separate areas (very annoying when putting dishes away and more annoying when you are dying for a cup of coffee and can't find a cup in the morning).
Step 1) I removed the wine rack that was installed in the cabinet
Step 2) I added two shelves to the interior. To make the project simple, I purchased two laminate shelves that were a similar color to my cabinet from The Container Store for $8 each and trimmed them down to size. Hey, it's a one hour makeover.
Step 3) I filled candy jars and a Keurig storage case on the bottom shelf. On the second shelf, I displayed white cappuccino cups and matching saucers. On the top shelf, I displayed white decorative teapots. I had two storage spaces on the right hand side of the cabinet. I used these spaces to store mugs that I use the most.
Step 4) I placed my Keurig underneath the cabinet and plugged it in. I found some really cool jumbo sized mason jars from Target that I filled with all of my coffee essentials (such as Splenda, sugar and cookies)
Step 5) In the bottom cabinet, I stored ALL of my mugs that were in various places around the kitchen.
 |
| I LOVE my new coffee station and I use it all the time. |
Sunday, January 6, 2013
If you build it, they will come...over for drinks
We have a huge kitchen island in our house that takes care of all our dining needs. In our home, it didn't make sense for us to have a separate formal dining room. We are always eating at the island and we are not formal dinner party people. I really feel style and decor should be based off function and needs of the people in the living room. In our case, it made most sense to have a large bar area and entertainment space. Cocktail hour followed by poker night, anyone?
 |
| Before: This was a pretty simple plan. I would build two shelve units that would house a small counter with storage in between it. There would be plenty of room for drinks (lots of drinks, haha), glassware and other miscellaneous bar ware. |
 |
| Bar in progress: Since I was adding a backing, I decided to use two pictures I already had around the house for a back splash effect. |
 |
| Bar in progress: I decided to add shelves above the counter. More storage for drinks :-) |
 |
After: I added trim, two coats of Minwax Ebony stain and one coat of semi-gloss polyurethane. The center storage unit has plenty of counter top space for drinks and our mini kegerator. There is also plenty of room inside to hold various party supplies (appetizer plates, extra glasses and two huge beverage tubs). The shelf unit on the left has a dedicated space for our new wine refrigerator ($148 on sale at Home Depot this week). I also left a dedicated space in the other shelf unit for our future cooler or another wine rack. No bar is complete without a game table. This is a 3-in-1 game table that has a removable dining table top to reveal bumper pool. The dining table top can also be flipped over for poker night. I found this gem on Craigslist for $150. |
Wednesday, December 19, 2012
Size Does Matter
We're hosting Christmas Eve at our house and my husband thinks our island countertop is too small at eight feet long.
We needed a quick and cheap solution. I purchased five 10 feet long boards at Home Depot and to create a plank style countertop. Pictures and details below.
Happy Holidays!
We needed a quick and cheap solution. I purchased five 10 feet long boards at Home Depot and to create a plank style countertop. Pictures and details below.
Happy Holidays!
 |
| Here's the "before". I originally created this island using some pre-made cabinets from Home Depot topped with a $98 wood countertop from Ikea. |
 |
| Here's the "during". I butted the boards together to create a plank style look. I filled the gaps with wood putty. I would later frame the ends with 1"x3" pine boards. |
 |
| I needed posts to accommodate the new length. Home Depot used to sell these great island legs for $29 each (I used those originally with my island). I can't find them anywhere. I ended up using two deck posts that I cut from 48" to 35". I really wanted to mimic the imperfections in reclaimed barn wood. I have a ton of stain that I inherited from my Dad sitting in my garage. I was finally able to use it by combining three different colors (Minwax Colonial, Cherry and Mahogany) for the color of this counter top. |
 |
| The "after". Not bad for one night after work and $95 in supplies, huh? |
Monday, November 26, 2012
It's beginning to look a lot like Christmas
 |
| We love the holidays! My husband loves Christmas and lights (a very dangerous combination). |
 |
| The husband's newest Christmas toy. This reindeer will be living on our roof until New Years. |
-
 |
| We're hosting our family's annual Christmas Eve party. The theme this year is tacky so I decorated our 10 foot tree with dollar store ornaments in bright colors. |
 |
| I realized that my house is very tacky this year so I took one of our extra trees and gave it a fancy makeover. I trimmed in dark blue and gold to complement my entryway's main colors. Good for pictures, right? |
 |
| I snuck in Mr. Pig (he lights up and is dressed as Santa). The entryway was looking a little too serious. Haha. |
Tuesday, November 20, 2012
Faux Sofa Table

I don't want to commit to a sofa table at this time and saw this idea on Pinterest. Rather than cough up a hundred bucks or more on a sofa table, I spent $21 at Home Depot for two L-brackets and a 10 inch wide by 8 foot long birch shelf.
I stained the board using a gel stain in deep mahogany that I had in my garage from another project. While waiting for the stain to dry, I screwed the L-brackets into the wall. I then waited, waited and waited for the stain to dry. After 4 hours, I had a new (faux) sofa table.


Saturday, November 17, 2012
Rainy Day Saturday: Faux Bedframe
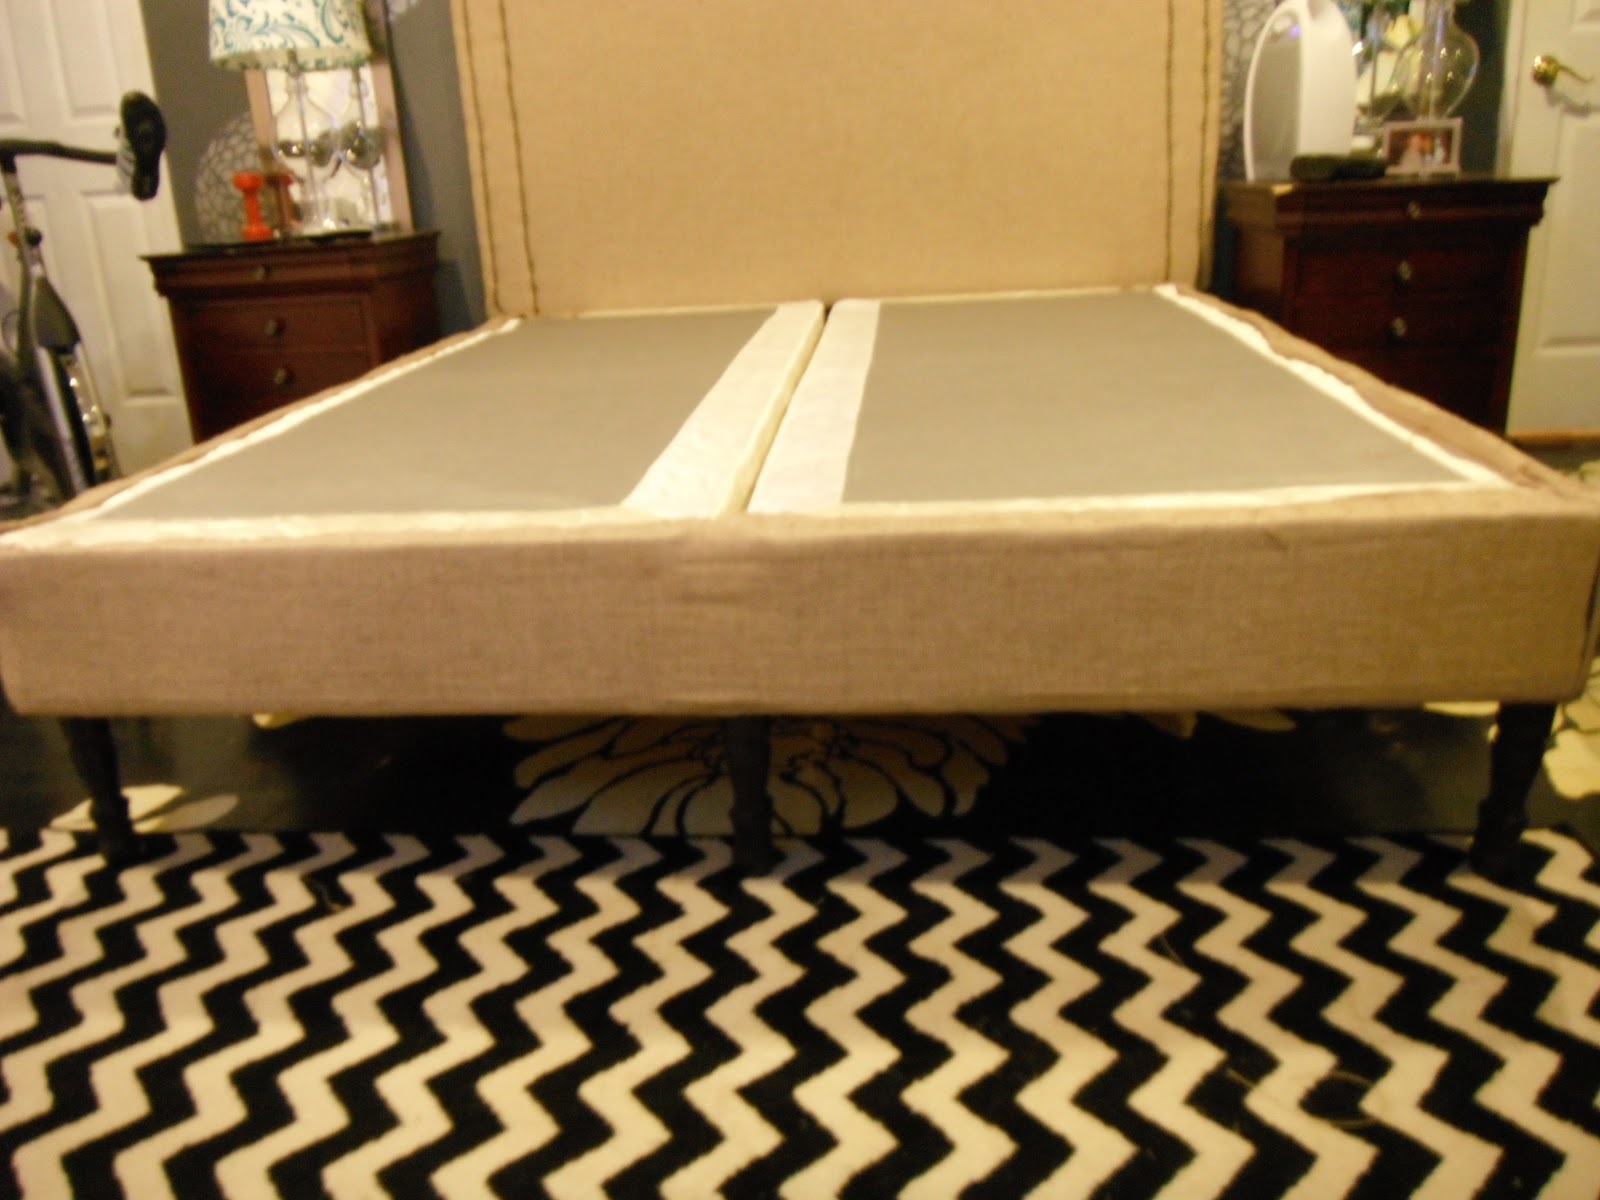 |
| Upholstered box spring with legs directly attached. |
I don't have a real bed frame. I have an upholstered headboard that I made last year from a sheet of MDF and a metal bed frame I bought on Overstock.com for $30. I love my headboard but I hate the metal bed frame.


I decided to upgrade the look of my bed by upholstering the box spring and adding legs directly onto the box spring. The legs give the bed height and a more finished look (and definitely more personality than a metal bed frame.
First, I flipped the box spring over. With king beds, the box spring comes in two pieces. I purchased 5 pine boards (6 feet long each and around $3 each) at Home Depot and screwed them onto the back side of the box springs. The boards would not only secure the box springs together but would also provide additional support.

When I upholstered my headboard, I used a panel from Target. Luckily, the panel is a standard basic style they keep all year. I went to Target and purchased another panel for $20. Using my staple gun, I covered the box spring.

After covering the box spring, I screwed mounting plates into the frame. The legs would screw directly into the mounting plates. The mounting plates were around $2 each and the legs were $3 each.


Doesn't it almost look like a real bed frame now? :-)
 |


Wednesday, November 14, 2012
It's 5 o'clock somewhere...
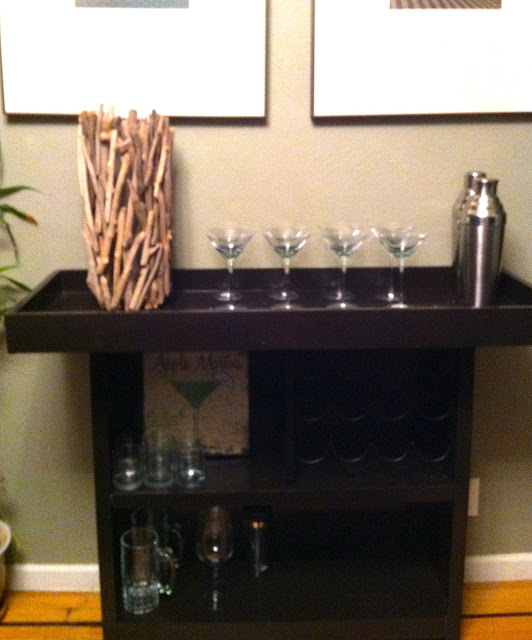
I needed a bar and couldn't find one that I liked or could afford and so I built my own. The project was fairly easy and took one day. I bought the materials from Home Depot and mostly used birch plywood for the bottom shelving and base and a pine board for the top. I spray painted the bar in Dark Walnut (from Rustoleum) and finished with 2 coats of polyurethane for extra protection.

Sunglass Storage!
Another great idea from Pinterest! I took a spare frame and spray it gray and added two rows of picture wire. I finished the project by stapling extra fabric to the back.
Voila! A sunglass holder for my closet. I'll never lose my sunglasses again!

Voila! A sunglass holder for my closet. I'll never lose my sunglasses again!

Monday, November 12, 2012
Closet Turned Mudroom
We have a moderately sized entryway closet. The closet had bi-fold doors that were barely on the hinges and the interior made no sense. The inside of the closet consisted of dusty wire shoe racks that barely fit our shoes, shelves that were too narrow to store anything of value and a closet rod that was too low to hold our coats.
My husband is always on the go with a giant gym bag, sneakers and a jacket. He couldn't use the closet and so he ended up storing his gear in our laundry closet or own our kitchen island (both places drove me crazy).
I came up with a storage solution that would make life convenient for him (his gym bag would finally find a permanent home) and less nerve wracking for me (I wouldn't have to twitch when eyeing his work gear on the island or on top of the washer).
I took off the bi-fold closet doors and gutted the interior. I left the top shelf in there and added one more below it and used extra plywood to make partitions. I then added trim from a prior project and painted the shelves and partitions black so it would look like one built-in piece.
For storage, I built a bench that was 24 inches in height and 45 inches in width. The top of the bench was on hinges to provide storage space. If needed, we could sit on it to put on our shoes but the bench was deep enough to store my husband's gym bag, laptop bag, and shoes. Since my husband always comes home with dirty clothes (he's a personal trainer and goes through shorts, socks and gym towels like crazy), I added added a partition in the bench that would devote 15 inches to hamper space.
We have a lot of parties and were never able to use the closet to store our guests' coats and bags (it would get lost in the chaos). To solve this, I added 8 coat hooks. The coat hooks will make it easy for guests to store their belongings during parties and find on their way out. For a finished look, I added white bead board.
Here are some pictures of the finished project.
My husband is always on the go with a giant gym bag, sneakers and a jacket. He couldn't use the closet and so he ended up storing his gear in our laundry closet or own our kitchen island (both places drove me crazy).
I came up with a storage solution that would make life convenient for him (his gym bag would finally find a permanent home) and less nerve wracking for me (I wouldn't have to twitch when eyeing his work gear on the island or on top of the washer).
I took off the bi-fold closet doors and gutted the interior. I left the top shelf in there and added one more below it and used extra plywood to make partitions. I then added trim from a prior project and painted the shelves and partitions black so it would look like one built-in piece.
For storage, I built a bench that was 24 inches in height and 45 inches in width. The top of the bench was on hinges to provide storage space. If needed, we could sit on it to put on our shoes but the bench was deep enough to store my husband's gym bag, laptop bag, and shoes. Since my husband always comes home with dirty clothes (he's a personal trainer and goes through shorts, socks and gym towels like crazy), I added added a partition in the bench that would devote 15 inches to hamper space.
We have a lot of parties and were never able to use the closet to store our guests' coats and bags (it would get lost in the chaos). To solve this, I added 8 coat hooks. The coat hooks will make it easy for guests to store their belongings during parties and find on their way out. For a finished look, I added white bead board.
Here are some pictures of the finished project.

In progress
 |
| Finished! The coat hooks are also great for hanging Christmas stockings. My husband is getting ready for Christmas :-) |
Saturday, November 10, 2012
Organized Scarves

My scarves were all over the place. I had some folded in baskets and others randomly hanging off coat hooks. I could never find a storage solution where I could keep my scarves in one place while also displaying them in open view.
I finally resolved this dilemma using extra closet rods from my last project (see my 11/09/2012 post about my latest closet makeover). I cut the closet rods into 22" pieces. I hung six rods in a small nook in the original closet of my new office/closet/ladycave (stay tuned for that posting).
Scarf storage dilemma solved. Not only is this a great space saver but all of my scarves are in open view. No more hunting through random baskets, hooks, hangers and dresser drawers for a certain piece because they are now all on display.
My scarves are now easy to find and easy to view.
Thursday, November 8, 2012
Outdoor Movie Night
A very generous client of my husband's gifted us with a projector. We already have a large television in the house and wondered what we could do with it. We decided on an outdoor movie night.
What's needed for outdoor movie night? First, one needs an outdoor movie screen.
If you go on eBay, you'll find a variety of outdoor movie screens from inflatable to metal frames. These were all out of my price range (an inflatable screen around 10x20" was $3,000!). I decided that I would build my own for $250. I searched online and found a website that sells raw projector material (this means that the ends are not finished and taped off with a border) for a very low price. I bought a 9X16" screen for only $89.50. For the frame, I decided to build it from 2x4's from Home Depot. I bought the lumber in 12" (this made the drive home very interesting). I spent around $140 on paint, lumber, screws and corner brackets.
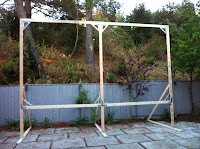


I'm lucky my husband works out. With his help, we secured the screen frame to the main frame with 3 inch screws.


What's needed for outdoor movie night? First, one needs an outdoor movie screen.
If you go on eBay, you'll find a variety of outdoor movie screens from inflatable to metal frames. These were all out of my price range (an inflatable screen around 10x20" was $3,000!). I decided that I would build my own for $250. I searched online and found a website that sells raw projector material (this means that the ends are not finished and taped off with a border) for a very low price. I bought a 9X16" screen for only $89.50. For the frame, I decided to build it from 2x4's from Home Depot. I bought the lumber in 12" (this made the drive home very interesting). I spent around $140 on paint, lumber, screws and corner brackets.


I'm only 5'1 and even on a 10 foot ladder, I couldn't reach the top of the frame to staple the screen on. Instead, I built the frame for the screen separately. I stretched the material on it and used my upholstery-grade stapler to secure it to the wood.


I'm lucky my husband works out. With his help, we secured the screen frame to the main frame with 3 inch screws.


Now that we had the movie screen up, we needed to have a sign. Why? Because all movies need a lit sign!


Using poster board, spray paint and Christmas lights, we now had a movie sign complete with lit-up arrow.


Every movie night needs a concession stand.


We had to keep the bright lights off in the backyard so they wouldn't interfere with the projector. My husband strung extra Christmas lights in clear with some battery operated lanterns.

Spaceballs in my backyard. An eighties classic!
Subscribe to:
Posts (Atom)