Sunday, January 6, 2013

If you build it, they will come...over for drinks

We have a huge kitchen island in our house that takes care of all our dining needs. In our home, it didn't make sense for us to have a separate formal dining room. We are always eating at the island and we are not formal dinner party people. I really feel style and decor should be based off function and needs of the people in the living room. In our case, it made most sense to have a large bar area and entertainment space. Cocktail hour followed by poker night, anyone?

Before: This was a pretty simple plan. I would build two shelve units that would house a small counter with storage in between it. There would be plenty of room for drinks (lots of drinks, haha), glassware and other miscellaneous bar ware.
Bar in progress: Since I was adding a backing, I decided to use two pictures I already had around the house for a back splash effect. 
Bar in progress: I decided to add shelves above the counter. More storage for drinks :-)


After: I added trim, two coats of Minwax Ebony stain and one coat of semi-gloss polyurethane.  The center storage unit has plenty of counter top space for drinks and our mini kegerator. There is also plenty of room inside to hold various party supplies (appetizer plates, extra glasses and two huge beverage tubs). The shelf unit on the left has a dedicated space for our new wine refrigerator ($148 on sale at Home Depot this week). I also left a dedicated space in the other shelf unit for our future  cooler or another wine rack.


No bar is complete without a game table. This is a 3-in-1 game table that has a removable dining table top to reveal bumper pool. The dining table top can also be flipped over for poker night. I found this gem on Craigslist for $150. 

Wednesday, December 19, 2012

Size Does Matter

We're hosting Christmas Eve at our house and my husband thinks our island countertop is too small at eight feet long.

We needed a quick and cheap solution. I purchased five 10 feet long boards at Home Depot and to create a plank style countertop. Pictures and details below.

Happy Holidays!


Here's the "before". I originally created this island using some pre-made cabinets from Home Depot topped with a $98 wood countertop from Ikea. 


Here's the "during". I butted the boards together to create a plank style look. I filled the gaps with wood putty. I would later frame the ends with 1"x3" pine boards.


I needed posts to accommodate the new length. Home Depot used to sell these great island legs for $29 each (I used those originally with my island). I can't find them anywhere. I ended up using two deck posts that I cut from 48" to 35". I really wanted to mimic the imperfections in reclaimed barn wood. I have a ton of stain that I inherited from my Dad sitting in my garage. I was finally able to use it by combining three different colors (Minwax Colonial, Cherry and Mahogany) for the color of this counter top. 

The "after". Not bad for one night after work and $95 in supplies, huh?


Monday, November 26, 2012

It's beginning to look a lot like Christmas


We love the holidays! My husband loves Christmas and lights (a very dangerous combination). 
The husband's newest Christmas toy. This reindeer will be living on our roof until New Years. 
-


We're hosting our family's annual Christmas Eve party. The theme this year is tacky so I decorated our 10 foot tree with dollar store ornaments in bright colors.


I realized that my house is very tacky this year so I took one of our extra trees and gave it a fancy makeover. I trimmed in dark blue and gold to complement my entryway's main colors.  Good for pictures, right?

I snuck in Mr. Pig (he lights up and is dressed as Santa). The entryway was looking a little too serious. Haha. 

Tuesday, November 20, 2012

Faux Sofa Table


I don't want to commit to a sofa table at this time and saw this idea on Pinterest. Rather than cough up a hundred bucks or more on a sofa table, I spent $21 at Home Depot for two L-brackets and a 10 inch wide by 8 foot long birch shelf.


I stained the board using a gel stain in deep mahogany that I had in my garage from another project. While waiting for the stain to dry, I screwed the L-brackets into the wall. I then waited, waited and waited for the stain to dry. After 4 hours, I had a new (faux) sofa table.


This was probably the easiest project I have yet to do on Pinterest. The most difficult part of this experience was waiting for the stain to dry on the shelf (that really tests your patience :-).


Saturday, November 17, 2012

Rainy Day Saturday: Faux Bedframe

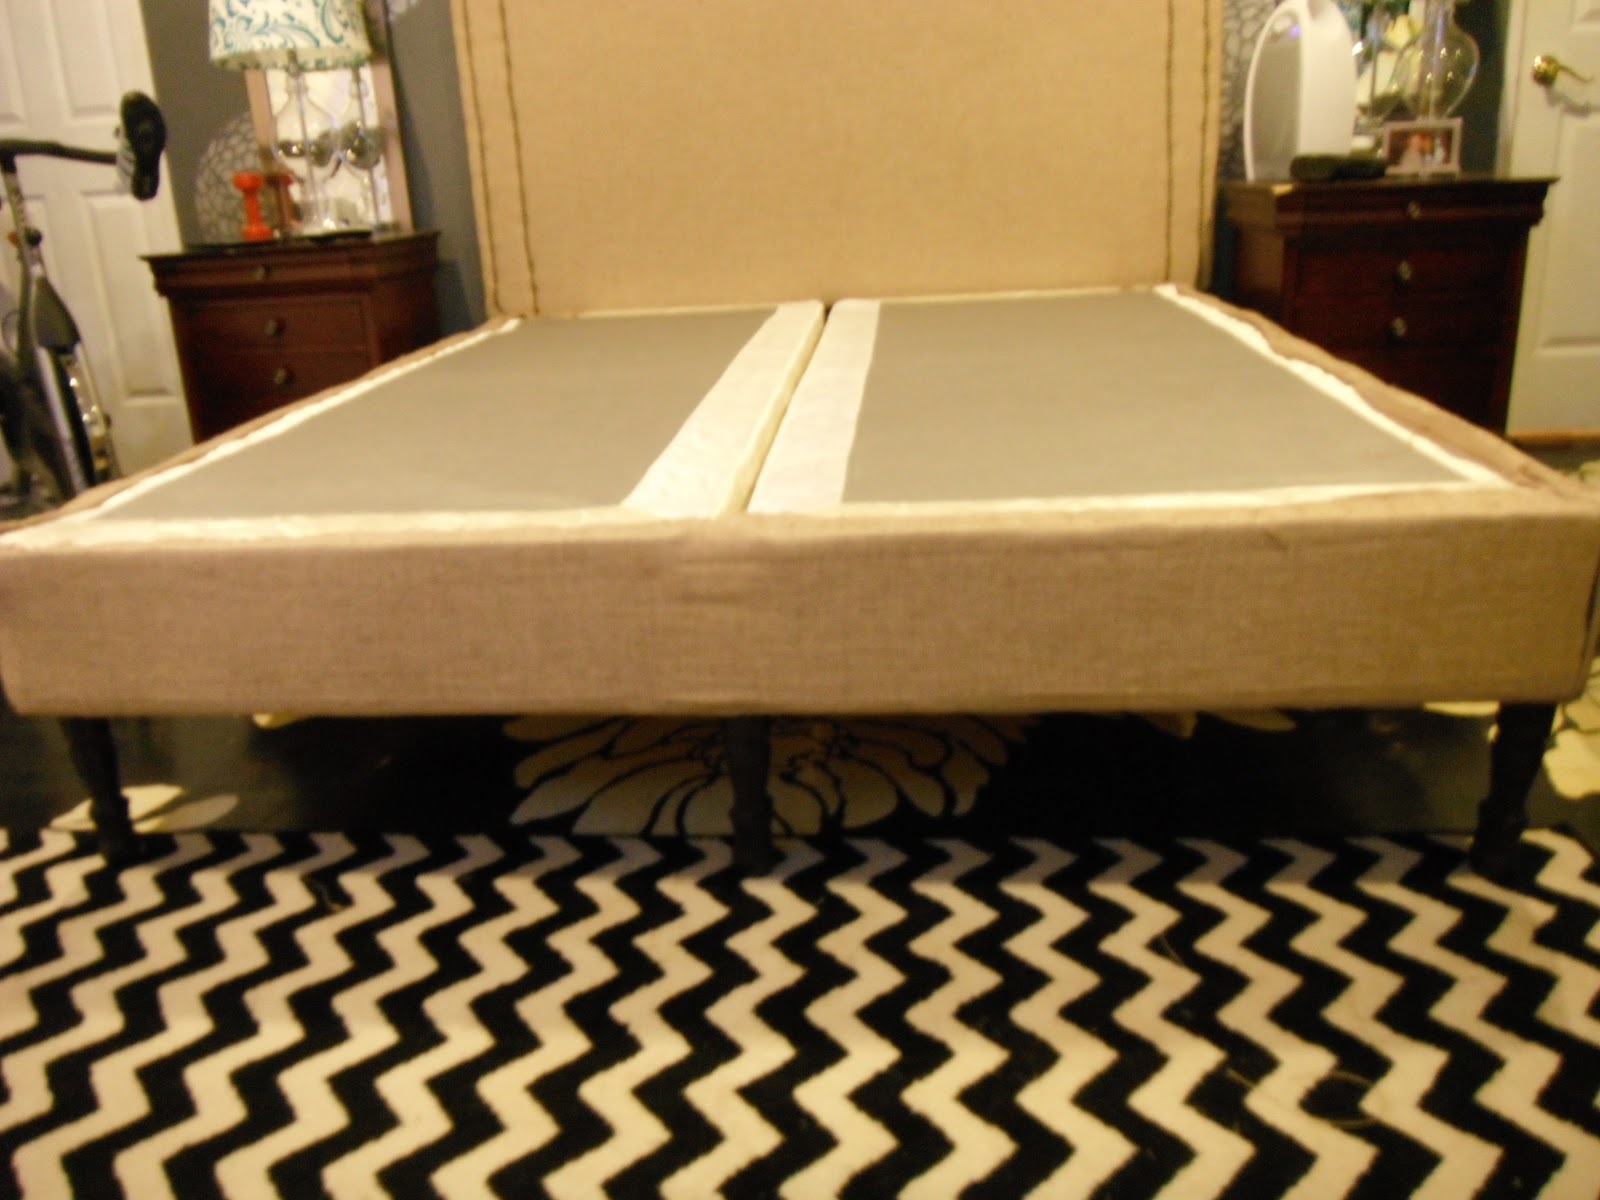
Upholstered box spring with legs directly attached. 
I really wanted to remove the dry rot in my deck and replace it with new 2x4s today but it's raining. Rain means all outdoor projects come to a halt and I need to find something else to do. So what did I do today? I decided to spruce up my bed.


I don't have a real bed frame. I have an upholstered headboard that I made last year from a sheet of MDF and a metal bed frame I bought on Overstock.com for $30. I love my headboard but I hate the metal bed frame.


I decided to upgrade the look of my bed by upholstering the box spring and adding legs directly onto the box spring. The legs give the bed height and a more finished look (and definitely more personality than a metal bed frame.

First, I flipped the box spring over. With king beds, the box spring comes in two pieces. I purchased 5 pine boards (6 feet long each and around $3 each) at Home Depot and screwed them onto the back side of the box springs. The boards would not only secure the box springs together but would also provide additional support.

When I upholstered my headboard, I used a panel from Target. Luckily, the panel is a standard basic style they keep all year. I went to Target and purchased another panel for $20. Using my staple gun, I covered the box spring.  


After covering the box spring, I screwed mounting plates into the frame.  The legs would screw directly into the mounting plates. The mounting plates were around $2 each and the legs were $3 each. 


Doesn't it almost look like a real bed frame now? :-)


Wednesday, November 14, 2012

It's 5 o'clock somewhere...

I needed a bar and couldn't find one that I liked or could afford and so I built my own. The project was fairly easy and took one day. I bought the materials from Home Depot and mostly used birch plywood for the bottom shelving and base and a pine board for the top. I spray painted the bar in Dark Walnut (from Rustoleum) and finished with 2 coats of polyurethane for extra protection.


Sunglass Storage!

Another great idea from Pinterest! I took a spare frame and spray it gray and added two rows of picture wire. I finished the project by stapling extra fabric to the back.

Voila! A sunglass holder for my closet. I'll never lose my sunglasses again!